15/02/13
In this lesson we outlined the conventions of Landscape Photography in terms of the industries that use it and the codes factored into this style of photography. (i.e. often to do with our [humans] coexistence within landscapes and organisation of space)
Akin to Portraiture Photography, Landscape derives from paintings, however, according to John Ruskin, the two differ greatly as he posits that the photograph cannot remake the picturesque and romanticised elements of paintings, due to its crude and mechanical style and the fact that it is merely a recording. This suggests that the photograph is perhaps too objective to portray a landscape as picturesque as it can supposedly only portray the truth, however, Ruskin fails to realise the part of the photographer as someone who has carefully considered ideologies thus forming subjective representations. The idea of projection is also featured in Landscape Photography (as well as Portraiture) as we, as the viewers of the photography, input our own emotions and opinions into the landscape presented to us. Roger Fenton describes a type of Landscape Photography in which an idealistic landscape photograph of a suburban region/countryside is taken back to those in the city and portrayed as real. He also describes the man made landscapes that often feature in photographs, that are constructed to appear as natural and realistic. The idea of bringing something back to a separate audience is something that comes into play in Documentary Photography in terms of the idea of The Other.
Gardening is an important factor in Landscape Photography as it also deals with the organisation of scenery and land, which is then documented by photographers. Gardening was first inspired, however, by artists picturesque visions in paintings thus outlining the continuous reproduction of ideologies.
The idea of Pictorialism also comes to play in this genre of photography, which is adopted by photographers such as Timothy H O'Sullivan and Edward Weston, and involves being removed from factoring in ideologies and opinions into a photograph and taking an objective standpoint in which the photographer merely documents the landscapes presented to them. Many argue that it isn't possible to record in this way as choices are always made about what to document, even if subconsciously.
Thus the 3 style of landscape photography include:
- Picturesque - evokes positivity/comfort (e.g. beauty spots/perfect views featured in post cards for example)
- Sublime - creates discomfort/unease
- Pictorialism - simple documentation
Edward Weston deals with still life and landscapes, and created the F64 group (i.e. f stop with a large depth of field = less subjective) who photographs in a pictorialistic style.
I will explore Landscape Photographers further in the Research section of my blog:
http://www.blogger.com/blogger.g?blogID=7154974702662515897#editor/target=post;postID=5888632896559593040
We also learned about Exposure in this lesson, and dealing with brightness ranges on the D7000, with the use of artificial lighting. The brightness range in a camera such as the D7000 can only partially capture the brightness that the human eye can see, and so, for example, on a sunny day, shadows will be extreme. To even this out an artificial light must be utilised, thus evening out the the brightness to something that appears more realistic to the eye.
We also learned about the direction and diffusion of light. The more direct, the harsher the light, the larger the shadows and thus the more unrealistic the photograph (i.e. flash gun) To combat this a softer light could be used or a surface that softens the light, such as a filter. Also the light source could be placed further away, as there would be more fall off from the light as it travels a further distance.
We tried to artificially light a dark room with a bright window in this lesson. We did this by taking a light reading from the main light source (i.e. zooming into the natural light from outside) and then zooming out, ignoring the change in the light meter on the camera, and taking a photo with the flash gun on. This brought up the dark room to a brighter and more realistic range, whilst ensuring that the window view was still visible and not darkened/blacked out, as it would have been, had we not taken the previous light reading from outside. Therefore everything in the photograph is realistic.
We also learned how to experiment with flash and photography, by lowering the shutter speed on the camera and leaving the aperture open for a longer time, in order to be able to draw with light. Myself and a friend tried this out, using the flash on my phone. These are the results...
In Weeks 7 & 8 we learned how to set-up and use the Bowen Portable Lighting Kit and Flash Gun effectively. The following are my notes from this lesson
- The process of altering the brightness range by light metering from brighter source to artificially light an area is called shooting at Parrity.
- Altering the exposure to maintain the shadows and brightness. Using a flash gun or artificial light to light the shadows, thus effecting more of a realistic representation.
- When using auto-focus you should half press the button to focus on face/place. You can move the camera physically and face/place is still remembered when you press the capture button fully.
- When photographing on a bright sunny day, to get a consistent light reading, find a mid-grey surface (i.e. concrete floor) to get a consistent reading throughout the day.
- M = Manual (set shutter speed and aperture manually), A = Aperture Priority (you can control aperture and D.O.F manually, camera controls shutter speed for correct exposure) S = Shutter Priority (you can control shutter speed, camera controls aperture) P = Auto (but can control ISO manually)
- When you press the display button on the Nikon D7000 (up button) Histogram representations of the photograph are portrayed. If the white in the histogram is more centered it means a more balanced photograph in terms of exposure/brightness
- On flash gun make sure mode is set to TTL (Through The Lens) and when particularly bright set to ( ) icon on the right hand side of the flash unit.
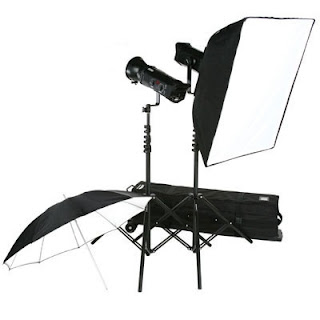
[Bowens Portable Lighting Kit]
________________________________________________________________________
- Bowens Portable Flash Kit - uses full stops whereas NikonD7000, for example, uses 1/3 stops. You must decide what aperture and shutter speed you wish to use on the NikonD7000 and use the handheld light meter to measure the light intensity at the position where the subject is sat in the studio set up, and change it accordingly via the dial on the flash light. You must match up the 1/3 stops on the Nikon with the full stops of the flash, and can refer to the Making Sense of F-Stops diagram below to do this. The decimal points between the full stops increase following the pattern of 3,6 and 9 so, for example, using a 1/3 stop of 3.2 on the Nikon would mean a full stop of 2.8.3 on the portable flash light.
- Tip: Capture photographs further back = more room to crop later on.
- Choose aperture for Depth of Field - all cameras have a preview button on front of camera next to lens. Look through viewfinder to see preview of depth of field that you have chosen.
- Can put camera in portrait angle on tripod. Twist and tighten it accordingly.
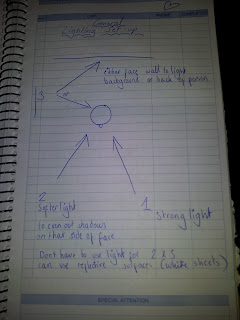
- Take the first meter reading from main light (Key Light) on right hand side of person. You can place the main light front-on to achieve a more flattering effect called the butterfly light. This creates shadows either side of the face and thins it out, and is often used in fashion photography. The more to the right that the Key Light is placed, the more dramatic the shot becomes due to the heightened shadows and highlights.
- The 2nd light, on left, (Fill Light) is used to even up the shadows created by the Key Light.
- The 3rd light (Back Light /Hair Light - to wall or back of persons head/hair) If you turn this up more than the key light, it becomes a back light shot. The Fill and Back Light do not necessarily have to be professional studio lights; could be flash guns, windows, polystyrene, white sheet/surfaces to reflect the light from the Key Light.
- Place light meter in front of subjects nose when taking the first light reading from the Key Light.
- You must 'dump' flash when turning the dial down. Just flash button on light before turning the dial down to save battery/power.
- Must connect lead of the hand held light meter to the flash
- Light meter the Fill Light at a lower intensity than Key Light e.g. if Key Light is f stop 5.6 and wanted to make 2nd light one full stop lower you would set it at f.4 (consult Making Sense of F Stops diagram)
- Following on from this, you must change the aperture on the camera because there's more light in the room. You should take another light meter reading from subjects nose when both lights flash, before you change the camera aperture.
- Press 'cell' button on back of Key Light so that it detects Fill Light flash, when it goes off, without having to be connected to camera (Fill light should be connected by lead).
- When metering light from a window/bright space change mode on light meter to sunshine button. Can change shutter speed to make background/window brighter.
- Make sure mode on hand held light meter is a flash icon and the letter 'c'

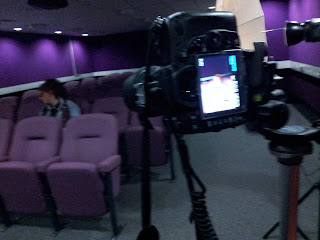
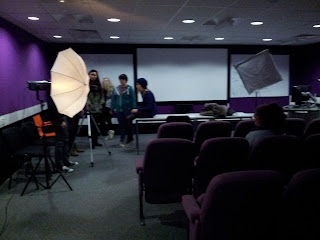
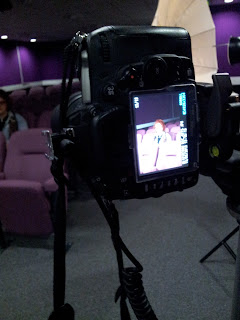
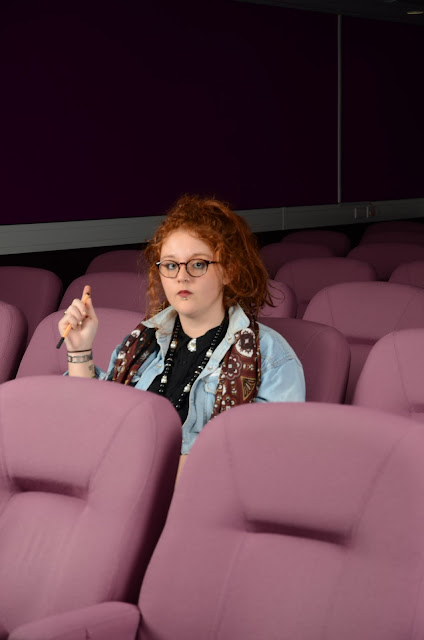
These are the results from our experimentation with the Bowens Lighting Kit:
We didn't use a back light for this shot, but I feel that this draws focus to the subject.
We were shooting at parity in this photograph as there is a window in the background. Thus there isn't need for a back light. I feel this photograph could benefit from a change it white balance to bring out the colours a tad more.
This information is useful for my project as I am taking portraiture photographs, however, I am still unsure as to whether I will use a formal studio lighting kit or just a flash gun. The reason being that I aim to interview my participants in a sense, with regards their memories and as my project is concerned with memory truth, I fear that a highly formal nature to shooting may evoke a false recital of these memories as the subject are likely to be highly aware of the camera, and the staged nature which may in turn evoke a tense or uncomfortable atmosphere. This is all very good knowledge to have, however, as I will be able to hopefully use it in future projects.
